

The short version: move the server's SSH off port 22, install the role, set your hostname, and run one playbook.
shell
1ansible-galaxy install -r requirements.yml2ansible-playbook -i hosts deploy-gitlab.ymlThe rest of this guide walks through every file you need and explains what the role does on the server. Everything below was tested with ansible-core 2.22 and GitLab CE 19.5 on Ubuntu 24.04 LTS.
What's inside
- An Ansible role, ansible-role-gitlab-docker, that installs Docker Engine from Docker's official apt repository.
- A Docker Compose setup for GitLab CE that follows GitLab's own Docker install docs: the
gitlab/gitlab-ceimage,GITLAB_OMNIBUS_CONFIG, three persistent volumes and the SSH port. - HTTPS from Let's Encrypt. GitLab's bundled Nginx requests and renews the certificate, so there's nothing extra to install.
What you get
A working GitLab server on your own domain, with HTTPS, Git over SSH on the standard port 22, and an optional container registry.
The first run takes about 10 minutes, most of it spent pulling the GitLab image and waiting for the first start. Running the playbook again changes nothing unless you change a variable, so you can keep it as the source of truth for the server.
Requirements
- A server with Ubuntu 24.04 LTS. Ubuntu 22.04 works too. GitLab's baseline is 8 vCPU and 16 GB of RAM. A small team can run it on 8 GB, but not less.
- A user with
sudoand SSH key access to the server. Python 3 is already installed on Ubuntu, so there's nothing to add. - ansible-core 2.18 or newer on your local machine. Check with
ansible --version. If you don't have it, follow the Ansible install guide. - DNS A records for GitLab and, if you want a registry, for the registry hostname. Both point to the server's IP.
- Ports 80 and 443 open to the internet. Let's Encrypt checks the domain over port 80, and it doesn't work with non-standard ports.
You don't need to install Docker yourself. The role adds Docker's apt repository and installs Docker Engine with the Compose plugin, the way Docker's docs recommend for servers. The get.docker.com convenience script is fine for a test box, but Docker doesn't recommend it for production.
Prepare the server
Step 1: Move the server's SSH off port 22
GitLab serves Git over SSH. If it takes port 22, clone URLs look clean (git@gitlab.example.com:group/project.git) and nobody has to remember a custom port. That means the server's own SSH has to move to another port first. This guide uses 7799.
⚠️ Keep your current SSH session open until you've logged in on the new port from a second terminal. If something goes wrong, you still have a way in.
Open the new port in the firewall first. On a cloud server, also add it to the security group or the provider's firewall.
shell
1sudo ufw allow 7799/tcpChange the port in the SSH config and check the syntax:
shell
1sudo sed -i 's/^#\?Port .*/Port 7799/' /etc/ssh/sshd_config2sudo sshd -tOn Ubuntu 24.04, SSH is socket-activated. systemd, not sshd, listens on the port, and it reads the port from sshd_config when you reload it. So a plain service ssh restart doesn't move the port. Reload systemd and restart the socket:
shell
1sudo systemctl daemon-reload2sudo systemctl restart ssh.socketIf systemctl is-enabled ssh.socket says disabled (some servers upgraded from older releases run SSH without the socket), run sudo systemctl restart ssh instead.
Check that SSH listens only on the new port:
shell
1sudo ss -tlnp | grep -E ':(22|7799) 'Now open a second terminal and log in on the new port. Your existing session stays connected while you test:
shell
1ssh -p 7799 ubuntu@203.0.113.10If it works, close the old session. If it doesn't, fix it from the old session before you do anything else.
If you'd rather leave the server's SSH on port 22, skip this step and set gitlab_ssh_port: 2424 in Step 5. GitLab then uses port 2424 for Git, and clone URLs include it.
Step 2: Check the DNS records
Both hostnames must resolve to the server before you run the playbook, or Let's Encrypt can't issue the certificate:
shell
1host gitlab.example.com2host registry.example.comEach command should print your server's IP, 203.0.113.10 in this guide.
Deploy GitLab with Ansible
Step 3: Create the project directory
On your local machine, create a directory with these files:
shell
1gitlab-deploy/2├── deploy-gitlab.yml3├── host_vars/4│ └── gitlab.example.com.yml5├── hosts6└── requirements.ymlThe same files are in the examples/ folder of the role's repository.
Step 4: Install the role and the Docker collection
requirements.yml pulls the role from GitHub and the community.docker collection. The role starts GitLab with that collection's Docker Compose module:
yaml
1---2roles:3 - name: gitlab4 src: https://github.com/itsyndicate/ansible-role-gitlab-docker.git5 scm: git6 version: main7
8collections:9 - name: community.docker10 version: ">=4.0.0"Install both:
shell
1ansible-galaxy install -r requirements.ymlStep 5: Write the inventory and variables
hosts tells Ansible where the server is. Note the SSH port from Step 1 and a regular user with sudo instead of root:
shell
1[gitlab]2gitlab.example.com ansible_host=203.0.113.10 ansible_port=7799 ansible_user=ubuntuhost_vars/gitlab.example.com.yml holds the settings for this server:
yaml
1---2gitlab_hostname: gitlab.example.com3gitlab_external_url: https://gitlab.example.com4gitlab_registry_external_url: https://registry.example.com5gitlab_letsencrypt_contact_email: admin@example.com6gitlab_time_zone: Europe/Kyiv7gitlab_email_from: gitlab@example.com8gitlab_email_display_name: GitLab9gitlab_email_reply_to: noreply@example.comA few things worth knowing:
- An
https://external URL turns on Let's Encrypt. The registry hostname goes on the same certificate. - GitLab renews the certificate on its own. Let's Encrypt no longer sends expiry emails, so the contact email won't warn you if renewal breaks. Add certificate expiry to your monitoring.
- Leave out
gitlab_registry_external_urlif you don't need a container registry. - The role pins the GitLab version (
gitlab_version,19.5.3-ce.0at the time of writing). Check Docker Hub for the latest tag and don't uselatestin production.
The full list of variables is in the repository's README.
Step 6: Write the playbook
deploy-gitlab.yml applies the role to the gitlab group:
yaml
1---2- name: Deploy GitLab in Docker3 hosts: gitlab4 become: true5 roles:6 - gitlabStep 7: Run the playbook
shell
1ansible-playbook -i hosts deploy-gitlab.ymlThe role installs Docker, writes the Compose file, starts GitLab and waits until GitLab finishes its first configuration and answers on its readiness endpoint. On the first run that takes 5 to 10 minutes. The last task prints the URL and how to get the root password.
Run it a second time and the recap should show changed=0. That's how you know the server matches the playbook.
Sign in to GitLab
Open https://gitlab.example.com in a browser. The username is root. GitLab generates the password on first start and stores it in the container:
shell
1sudo docker exec gitlab grep 'Password:' /etc/gitlab/initial_root_passwordSign in and change the password right away in your user settings, under Password. GitLab deletes this file on the first container restart after 24 hours, so don't count on it later.
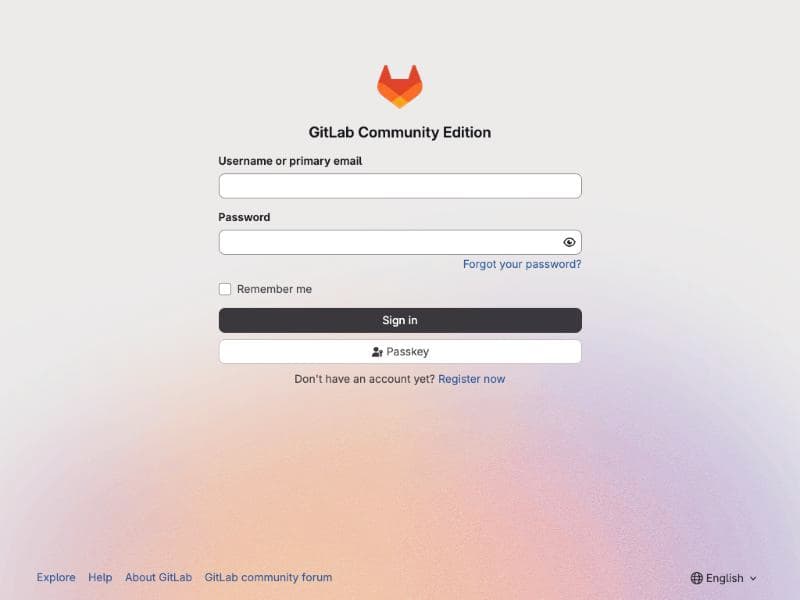
Two more things before you invite the team:
- Sign-up. The sign-in page has a Register link. New accounts wait for admin approval by default, but if only your team uses the server, turn registration off in the Admin area under Settings, General, Sign-up restrictions.
- SSH key. Add your key in your user settings and push a test repository. The clone URL looks like
git@gitlab.example.com:group/project.git, with no port number.
What the role does on the server
If you want to check the setup by hand or run it without Ansible, here's what ends up on the server. The role writes /srv/gitlab/compose.yml:
yaml
1services:2 gitlab:3 image: gitlab/gitlab-ce:19.5.3-ce.04 container_name: gitlab5 restart: always6 hostname: gitlab.example.com7 environment:8 GITLAB_OMNIBUS_CONFIG: |9 external_url 'https://gitlab.example.com'10 gitlab_rails['gitlab_shell_ssh_port'] = 2211 gitlab_rails['time_zone'] = 'Europe/Kyiv'12 registry_external_url 'https://registry.example.com'13 letsencrypt['contact_emails'] = ['admin@example.com']14 gitlab_rails['gitlab_email_from'] = 'gitlab@example.com'15 gitlab_rails['gitlab_email_display_name'] = 'GitLab'16 gitlab_rails['gitlab_email_reply_to'] = 'noreply@example.com'17 ports:18 - "80:80"19 - "443:443"20 - "22:22"21 volumes:22 - ./config:/etc/gitlab23 - ./logs:/var/log/gitlab24 - ./data:/var/opt/gitlab25 shm_size: 256mThen it runs the equivalent of docker compose up -d in /srv/gitlab. All state lives in three folders:
/srv/gitlab/configholdsgitlab.rbandgitlab-secrets.json./srv/gitlab/dataholds repositories, the database and uploads./srv/gitlab/logsholds the logs.
Settings from GITLAB_OMNIBUS_CONFIG are applied every time the container starts. To change a setting, edit the variables, run the playbook, and the role recreates the container. For settings the role doesn't have a variable for, use gitlab_extra_config with raw gitlab.rb lines.
⚠️ Docker publishes ports 80, 443 and 22 straight through iptables, so ufw rules don't apply to them. If GitLab must not be public, restrict access in the cloud firewall or read Docker's notes on firewalls.
Day-two operations
The GitLab image doesn't include a mail server. To send notifications and password resets, add your SMTP provider's settings to gitlab_extra_config. GitLab's SMTP docs have ready examples for common providers.
Backups
Create a backup of repositories and the database:
shell
1sudo docker exec -t gitlab gitlab-backup createThe archive lands in /srv/gitlab/data/backups. It doesn't include gitlab.rb and gitlab-secrets.json, so copy /srv/gitlab/config separately. Without the secrets file, a restore loses CI variables and 2FA settings. Details are in GitLab's Docker backup docs.
Upgrades
Change gitlab_version in host_vars and run the playbook. The role pulls the new image and recreates the container, and GitLab migrates the database on start. Take a backup first, and don't jump across major versions: follow GitLab's upgrade path and stop at every required version.
Troubleshooting
- 502 "Waiting for GitLab to boot". GitLab is still starting or restarting its services. Give it a few minutes, or watch
sudo docker logs -f gitlab. - Let's Encrypt fails. Check that DNS points to the server and that port 80 is open in every firewall. GitLab's SSL docs list the common errors.
port is already allocatedfor port 22. The server's own SSH still listens on 22. Go back to Step 1 or setgitlab_ssh_portto another port.- The container restarts or stays
unhealthy. Usually it's memory. Checkfree -hand GitLab's tips for memory-constrained environments.
If you run GitLab behind your own Nginx instead of the bundled one, our guide to automated Let's Encrypt SSL installation with Ansible covers the certificate side.
New to Docker? Our list of top docker commands helps you find your way around containers like the gitlab one here. Use it as a cheat sheet and practice regularly, and the commands will become second nature.
If you'd rather not run GitLab, its upgrades and backups yourself, our team can do it for you. Take a look at our DevOps automation and CI/CD services.